
Promoting Characters to 6 Star Guide [Enhancing, Awakening & Leveling]
![Promoting Characters to 6 Star Guide [Enhancing, Awakening & Leveling]](https://epic7x.com/wp-content/uploads/2019/01/thumbs.png)
Table of Contents
Overview
Welcome to the beginners guide for promoting your units to 6 stars! Getting a unit to 6 star takes a long time and can be a very time consuming process if you do not realise how much experience gain you miss out on by not doing certain things. We will go over the basics and some advanced stuff so you know how to level your characters efficiently.
Promoting Basics
So in order to get your character to the next star level, you will need to know the following:
- 2★ -> 3★ = Requires two 2★ units, 10,000 gold
- 3★ -> 4★ = Requires three 3★ units, 20,000 gold
- 4★ -> 5★ = Requires four 3★ units, 40,000 gold
- 5★ -> 6★ = Requires five 5★ units, 120,000 gold
Star levels will indicate the max level a character can be.
- 2★ = Max Level 20
- 3★ = Max Level 30
- 4★ = Max Level 40
- 5★ = Max Level 50
- 6★ = Max Level 60
Experience gain will also vary depending on the natural star level of the character. At the beginning, you can use 1★/2★ elemental penguins to get your characters some quick levels. 3★ penguins are harder to come by, so you won’t be using it too often for some quick levels.
Below are the tables for the experience gain for each star level:
Natural 2★
| Lvl | to Next | Total |
| 1 | 150 | 0 |
| 2 | 165 | 150 |
| 3 | 180 | 315 |
| 4 | 195 | 495 |
| 5 | 210 | 690 |
| 6 | 225 | 900 |
| 7 | 255 | 1,125 |
| 8 | 285 | 1,380 |
| 9 | 330 | 1,665 |
| 10 | 375 | 1,995 |
| 11 | 435 | 2,370 |
| 12 | 885 | 2,805 |
| 13 | 975 | 3,690 |
| 14 | 1,080 | 4,665 |
| 15 | 1,200 | 5,745 |
| 16 | 1,875 | 6,945 |
| 17 | 2,025 | 8,820 |
| 18 | 2,205 | 10,845 |
| 19 | 2,415 | 13,050 |
| 20 | 2,655 | 15,465 |
| 21 | 3,555 | 18,120 |
| 22 | 3,795 | 21,675 |
| 23 | 4,050 | 25,470 |
| 24 | 4,320 | 29,520 |
| 25 | 4,605 | 33,840 |
| 26 | 5,505 | 38,445 |
| 27 | 5,820 | 43,950 |
| 28 | 6,150 | 49,770 |
| 29 | 6,495 | 55,920 |
| 30 | 6,855 | 62,415 |
| 31 | 8,655 | 69,270 |
| 32 | 9,075 | 77,925 |
| 33 | 9,525 | 87,000 |
| 34 | 10,005 | 96,525 |
| 35 | 10,515 | 106,530 |
| 36 | 12,315 | 117,045 |
| 37 | 12,885 | 129,360 |
| 38 | 13,485 | 142,245 |
| 39 | 14,115 | 155,730 |
| 40 | 14,775 | 169,845 |
| 41 | 18,375 | 184,620 |
| 42 | 19,080 | 202,995 |
| 43 | 19,830 | 222,075 |
| 44 | 20,625 | 241,905 |
| 45 | 21,465 | 262,530 |
| 46 | 25,065 | 283,995 |
| 47 | 25,995 | 309,060 |
| 48 | 26,970 | 335,055 |
| 49 | 27,990 | 362,025 |
| 50 | 29,055 | 390,015 |
| 51 | 36,255 | 419,070 |
| 52 | 37,425 | 455,325 |
| 53 | 38,670 | 492,750 |
| 54 | 39,990 | 531,420 |
| 55 | 42,240 | 571,410 |
| 56 | 45,240 | 613,650 |
| 57 | 49,440 | 658,890 |
| 58 | 56,640 | 708,330 |
| 59 | 65,640 | 764,970 |
| 60 | 830,610 |
Natural 3★
| 1 | 150 | 0 |
| 2 | 215 | 150 |
| 3 | 230 | 365 |
| 4 | 245 | 595 |
| 5 | 260 | 840 |
| 6 | 275 | 1,100 |
| 7 | 305 | 1,375 |
| 8 | 335 | 1,680 |
| 9 | 380 | 2,015 |
| 10 | 425 | 2,395 |
| 11 | 485 | 2,820 |
| 12 | 935 | 3,305 |
| 13 | 1,025 | 4,240 |
| 14 | 1,130 | 5,265 |
| 15 | 1,250 | 6,395 |
| 16 | 1,925 | 7,645 |
| 17 | 2,075 | 9,570 |
| 18 | 2,255 | 11,645 |
| 19 | 2,465 | 13,900 |
| 20 | 2,705 | 16,365 |
| 21 | 3,605 | 19,070 |
| 22 | 3,845 | 22,675 |
| 23 | 4,100 | 26,520 |
| 24 | 4,370 | 30,620 |
| 25 | 4,655 | 34,990 |
| 26 | 5,555 | 39,645 |
| 27 | 5,870 | 45,200 |
| 28 | 6,200 | 51,070 |
| 29 | 6,545 | 57,270 |
| 30 | 6,905 | 63,815 |
| 31 | 8,705 | 70,720 |
| 32 | 9,125 | 79,425 |
| 33 | 9,575 | 88,550 |
| 34 | 10,055 | 98,125 |
| 35 | 10,565 | 108,180 |
| 36 | 12,365 | 118,745 |
| 37 | 12,935 | 131,110 |
| 38 | 13,535 | 144,045 |
| 39 | 14,165 | 157,580 |
| 40 | 14,825 | 171,745 |
| 41 | 18,425 | 186,570 |
| 42 | 19,130 | 204,995 |
| 43 | 19,880 | 224,125 |
| 44 | 20,675 | 244,005 |
| 45 | 21,515 | 264,680 |
| 46 | 25,115 | 286,195 |
| 47 | 26,045 | 311,310 |
| 48 | 27,020 | 337,355 |
| 49 | 28,040 | 364,375 |
| 50 | 29,105 | 392,415 |
| 51 | 36,305 | 421,520 |
| 52 | 37,475 | 457,825 |
| 53 | 38,720 | 495,300 |
| 54 | 40,040 | 534,020 |
| 55 | 42,290 | 574,060 |
| 56 | 45,290 | 616,350 |
| 57 | 49,490 | 661,640 |
| 58 | 56,690 | 711,130 |
| 59 | 65,690 | 767,820 |
| 60 | 833,510 |
Natural 4★
| Lvl | to Next | Total |
| 1 | 320 | 0 |
| 2 | 270 | 320 |
| 3 | 290 | 590 |
| 4 | 310 | 880 |
| 5 | 330 | 1,190 |
| 6 | 350 | 1,520 |
| 7 | 390 | 1,870 |
| 8 | 430 | 2,260 |
| 9 | 490 | 2,690 |
| 10 | 550 | 3,180 |
| 11 | 630 | 3,730 |
| 12 | 1,230 | 4,360 |
| 13 | 1,350 | 5,590 |
| 14 | 1,490 | 6,940 |
| 15 | 1,650 | 8,430 |
| 16 | 2,550 | 10,080 |
| 17 | 2,750 | 12,630 |
| 18 | 2,990 | 15,380 |
| 19 | 3,270 | 18,370 |
| 20 | 3,590 | 21,640 |
| 21 | 4,790 | 25,230 |
| 22 | 5,110 | 30,020 |
| 23 | 5,450 | 35,130 |
| 24 | 5,810 | 40,580 |
| 25 | 6,190 | 46,390 |
| 26 | 7,390 | 52,580 |
| 27 | 7,810 | 59,970 |
| 28 | 8,250 | 67,780 |
| 29 | 8,710 | 76,030 |
| 30 | 9,190 | 84,740 |
| 31 | 11,590 | 93,930 |
| 32 | 12,150 | 105,520 |
| 33 | 12,750 | 117,670 |
| 34 | 13,390 | 130,420 |
| 35 | 14,070 | 143,810 |
| 36 | 16,470 | 157,880 |
| 37 | 17,230 | 174,350 |
| 38 | 18,030 | 191,580 |
| 39 | 18,870 | 209,610 |
| 40 | 19,750 | 228,480 |
| 41 | 24,550 | 248,230 |
| 42 | 25,490 | 272,780 |
| 43 | 26,490 | 298,270 |
| 44 | 27,550 | 324,760 |
| 45 | 28,670 | 352,310 |
| 46 | 33,470 | 380,980 |
| 47 | 34,710 | 414,450 |
| 48 | 36,010 | 449,160 |
| 49 | 37,370 | 485,170 |
| 50 | 38,790 | 522,540 |
| 51 | 48,390 | 561,330 |
| 52 | 49,950 | 609,720 |
| 53 | 51,610 | 659,670 |
| 54 | 53,370 | 711,280 |
| 55 | 56,370 | 764,650 |
| 56 | 60,370 | 821,020 |
| 57 | 65,970 | 881,390 |
| 58 | 75,570 | 947,360 |
| 59 | 87,570 | 1,022,930 |
| 60 | 1,110,500 |
Natural 5★
| Lvl | to Next | Total |
| 1 | 350 | 0 |
| 2 | 275 | 350 |
| 3 | 300 | 625 |
| 4 | 325 | 925 |
| 5 | 350 | 1,250 |
| 6 | 375 | 1,600 |
| 7 | 425 | 1,975 |
| 8 | 475 | 2,400 |
| 9 | 550 | 2,875 |
| 10 | 625 | 3,425 |
| 11 | 725 | 4,050 |
| 12 | 1,475 | 4,775 |
| 13 | 1,625 | 6,250 |
| 14 | 1,800 | 7,875 |
| 15 | 2,000 | 9,675 |
| 16 | 3,125 | 11,675 |
| 17 | 3,375 | 14,800 |
| 18 | 3,675 | 18,175 |
| 19 | 4,025 | 21,850 |
| 20 | 4,425 | 25,875 |
| 21 | 5,925 | 30,300 |
| 22 | 6,325 | 36,225 |
| 23 | 6,750 | 42,550 |
| 24 | 7,200 | 49,300 |
| 25 | 7,675 | 56,500 |
| 26 | 9,175 | 64,175 |
| 27 | 9,700 | 73,350 |
| 28 | 10,250 | 83,050 |
| 29 | 10,825 | 93,300 |
| 30 | 11,425 | 104,125 |
| 31 | 14,425 | 115,550 |
| 32 | 15,125 | 129,975 |
| 33 | 15,875 | 145,100 |
| 34 | 16,675 | 160,975 |
| 35 | 17,525 | 177,650 |
| 36 | 20,525 | 195,175 |
| 37 | 21,475 | 215,700 |
| 38 | 22,475 | 237,175 |
| 39 | 23,525 | 259,650 |
| 40 | 24,625 | 283,175 |
| 41 | 30,625 | 307,800 |
| 42 | 31,800 | 338,425 |
| 43 | 33,050 | 370,225 |
| 44 | 34,375 | 403,275 |
| 45 | 35,775 | 437,650 |
| 46 | 41,775 | 473,425 |
| 47 | 43,325 | 515,200 |
| 48 | 44,950 | 558,525 |
| 49 | 46,650 | 603,475 |
| 50 | 48,425 | 650,125 |
| 51 | 60,425 | 698,550 |
| 52 | 62,375 | 758,975 |
| 53 | 64,450 | 821,350 |
| 54 | 66,650 | 885,800 |
| 55 | 70,400 | 952,450 |
| 56 | 75,400 | 1,022,850 |
| 57 | 82,400 | 1,098,250 |
| 58 | 94,400 | 1,180,650 |
| 59 | 109,400 | 1,275,050 |
| 60 | 1,384,450 |
Awakening

When you awaken your characters, they will gain bonus base stats and the third awakening improves a skill of the character. The first main stat increase can be the following:
- Health%
- Attack%
- Defense%
- Critical Hit Rate%
- Critical Hit Damage%
- Effectiveness%
- Effect Resistance%
- Speed
In order to awaken (1★ to 4★), you need to farm the materials from the spirit alter. On weekends, all elemental spirit altars are open. On the weekdays, only 1 elemental altar is open.
- Monday (Dark)
- Tuesday (Flame)
- Wednesday (Ice)
- Thursday (Earth)
- Friday (Light)
For the 5★/6★ awakening, you will need to farm catalysts, which are dropped form monsters from adventure or special event maps. You can check out where to farm them by clicking here.
Skill Upgrades


In order to enhance your skills, you need to get MolaGoras. They can be gotten from a few places. Sometimes special events will give you a few. But the more permanent spots to get them are:
- Transmit Stone Shop -> 15 for 1 MolaGora Weekly
- Conquest Point Shop -> 150 for 1 MolaGora Seed Weekly
- Guild Shop -> 150 for 1 MolaGora Seed Weekly
You will then need to turn these MolaGora seeds in the Forest of Spirit into MolaGoras.
There is also a red version called MolaGoraGo, which you can get a few from the Abyss floor 40. They are used for higher skill levels.
You can also exchange 4 MolaGora for 1 MolaGoraGo in the normal shop now!
Keep in mind most skills also need catalysts to upgrade alongside the MolaGoras.
Memory Imprint

Memory Imprint gives your team bonus stats. It will unlock Devotion Skills. Each character will have a different type. In order to imprint, you feed the same copy of the character to get the imprint. 4★ and 5★ characters are harder to imprint since they are much rarer than a 3★ one.
Upgrading Forest of Souls (Sanctuary)


Upgrading the Spirit Well building using Breath of Orbis 3 times, you will be able to grow 3 Mega Phantasma’s daily. Phantasma’s are used as fodders to upgrade your characters. You should always use mega/giga Phantasma’s as fodders because they give 3/6% bonus experience respectively while you level them. They only downside is that you can only level 1 of each type.
- Mega(Silver) -> Comes at 2★ Max
- Giga(Gold) -> Comes at 3★ Max
- Tera(Purple) -> Comes 4★ Max
6 Star Fodder Process
- Raise regular monsters to 20. Promote to 3★
- Raise mega phantasma to 30. Promote to 4★ (using monsters that are 3★).
- Raise giga phantasma to 4★. Promote to 5★ (using mega phantasmas that are 4*).
- Tera phantasma doesn’t need leveling. Promote to 5★ using 4 giga phantasmas.
However, if you are lazy and want your first 6★ quickly, you can just immediately promote them to the next level and use that as fodder. It is not as efficient but it will make your life easier once you have your first 6★ farming character.
Recommended 6 Star Farmers
Now that you know what it takes to get a 6★ character, it is time to talk a bit about who to use as your farmer to help you raise more 6★ characters. The farmer is also often called “Bus Driver” or “Carry” as they make leveling fodders a breeze. A farmer’s job is to carry 3 fodders in relative tough maps and gain decent experience.
But not every character can do that well. Below are some really good ones that can do it pretty well.
Lorina (Dark 3★)
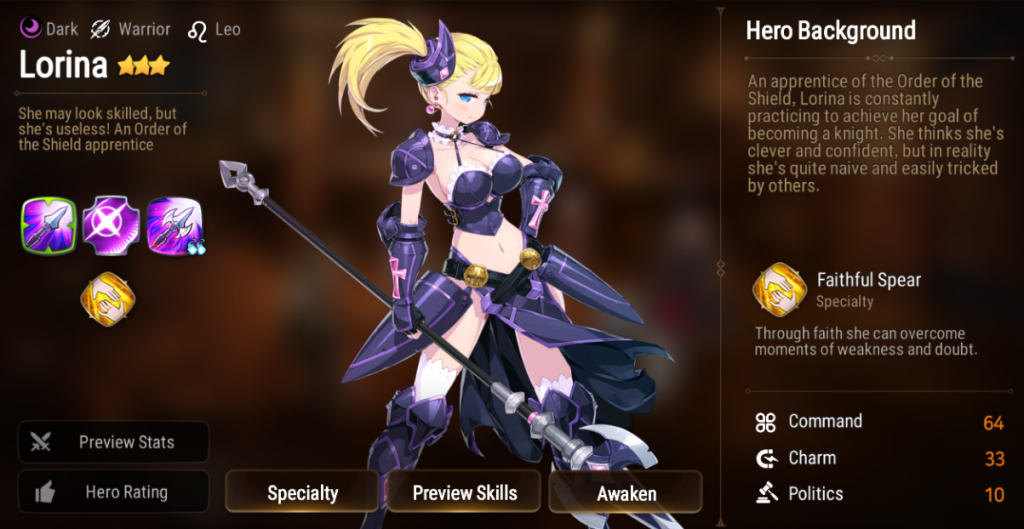
Lorica is a free unit and you can get her once you complete her connection. She is a single target burst damage dealer, but if you need a farmer, you can slap the Abyss vampire set after you completed Abyss Floor 36. She still does decent damage and can lifesteal enough so she does enough damage to sustain herself and clear missions relatively easily.
Later on, you can switch her to a full DPS set of either Attack/Crit or Destruction/Crit set when you get dedicated farmers.
Farmers to Re-roll
Sez (Ice 5★)

One of the best farmers due to him being able to move another turn if you get an enemy’s health below 50%. His third skill is a hard hitting attack that also damage surrounding enemies. He also has unhealable debuff, a very useful debuff against healing types. Get him to 6★ and he is a very fast and reliable AoE farmer. Have a look at this Sez and Vildred dual farm here.
Recommended set – Attack/Crit with Crit R%,Atk% and Atk% main stat on Necklace, Ring and Boots.
Ravi (Flame 5★)

Ravi is a tanky bruiser that is very reliable when it comes to being a farmer. Her first skill comes with life leech and her second skill is a passive that makes her move faster and hit harder as the battle goes on. Her third skill is an AoE stun attack. When you are auto-ing maps, you can switch off her skill so the only thing she uses is her first attack. That means she will always life leech.
She may not be as fast as Sez when it comes to farming, but she can solo much tougher stages than Sez and for more experience. If you are not to concerned with the time it takes to farm a stage, she is a solid choice.
Recommended set – Attack/Crit with Crit R%,Atk% and Atk% main stat on Necklace, Ring and Boots.
Vildred (Earth 5★)

What makes him so good is his additional AoE attack + attack buff when he kills an enemy. His first skill also hits 2 enemies. His second skill is the additional AoE attack. His third skill is a strong AoE attack that does not have a very long attack animation.
https://www.youtube.com/watch?v=k_QwzhZzZ8M
Vildred is one of the fastest speed farmers. If you want to farm fast in record time, this is the guy to choose. His attacks scale with speed, but also benefit from attack stats.
Recommended set – Speed/Crit with Crit R%,Atk% and Speed main stat on Necklace, Ring and Boots.
Dingo (Flame 4★)

Dingo is a decent farmer. His first skill applies bleed and has a 35% chance to activate his second skill, which is an AoE attack that can apply burn if the enemy is already bleeding. His third skill dispels all debuffs and reduce team cooldown by 1. The good part is that his third skill cooldown goes down by 1 if he kills an enemy.
He is excellent for adventure map farming and also in Golem Hunt. I recommend that you make him the main farmer and he also solves issues with debuffs, especially in the tough Abyss floors.
Recommended set – Speed/Hit with Effectiveness%, Atk% and Speed main stat on Necklace, Ring and Boots.
Clarissa (Ice 4★)

A budget version of Sez and is very reliable at farming as well. She is also quite useful in the arena. Her first skill has 35% chance for defense break. Her second skill is a passive that gives enrage (+10% attack and speed) when you kill and enemy. It also grants an extra AoE attack as well. The third skill is an AoE attack that can bleed. It applies 2 stacks of bleed if she has the enraged buff.
I am currently using her as a farmer and part of my Wyvern, Banshee and Arena team. She is a well rounded character that can do most content due to her versatile skill set.
Recommended set – Vampire/Crit with Atk%, Atk% and Atk% main stat on Necklace, Ring and Boots.
Cidd (Earth 4★)

A strong single target attacker that can apply defense debuff when he is sped up. His first skill gains speed up when he crits. His second skill is a passive that makes his first skill hit very hard when he has speed up buff. His third skill is a strong single target nuke that gives him an extra turn when he kills an enemy. As you can see, he can get a lot of turns if he one shots monsters!
Aside from being a strong single target attacker, he also shines in the arena as the dedicated Sez or any Ice DPS type character.
Recommended set – Speed/Crit with Crit R%, Atk% and Speed main stat on Necklace, Ring and Boots.
Leveling and Farming Locations
When it comes to leveling, you have a few options. You can focus on the following:
- 4 fodders and 1 friend support (best experience)
- 3 fodders and a farmer (most optimal)
- 2 fodders and 2 farmers (okay)
- 1 fodder and 3 farmers (not the best for experience but usually much faster)

Usually 3 fodder and 1 farmer is the standard farming situation (+friend support)
The only downside of doing 4 fodders and a friend support is that you don’t always have friend supports that can carry those fodders, especially on harder maps (World maps past 3-1).
Using 1 fodder and 3 farmers is a good one when leveling Phantasma’s, since they get bonus 10% experience, so it offsets some of the experience lost with using 3 farmers.
Location, Location, Location!
At the start of the game, you will want to just prioritise 6 starring your farmer. Also depending on the element of your farmer, you want to head over to adventure mode maps where it favors the element of your character.
Below are some nice farming spots for various elements:
Flame
- 6-3 (Normal Difficulty), also drops Order of the Shield Insignia and Special Alarm Loop.
- 1-3 (World Difficulty), also drops Eternal Forest Dust and Slime Jelly.
- 1-9 (World Difficulty), also drops Blood Flaked Bone and Cursed Ashes.
Ice
- 9-1 (Normal Difficulty), also drops Ring of Glory.
- 9-6 (Normal Difficulty), also drops Flame of Soul and Mysterious Flash
- 10-4 Boss (Normal Difficulty), also drops Flame of Soul and Ring of Glory
- 3-8 (World Difficulty), also drops Baby Mouse Insignia.
Nature
- 8-1 and 8-2 (Normal Difficulty), also drops Eternal Forest Dust and Slime Jelly.
- 2-6 Boss (World Difficulty), also drops Path Power Loop, Special Alarm Loop and Reingar Student ID
Selling Equipment and Fodders
When you are doing your runs, you will find out that you may run out of inventory or monster space. Try to bulk sell equipment by going to the equipment section, select all and sell them at once for gold. This way, you don’t spend time trying to upgrade equipment or doing other things to slow down your leveling.
As for 2 star fodders, you will run out of them very quickly if you don’t have enough space. I recommend at least go after 200 slots so you can store enough fodders to not run out of space. If you really need space, I suggest selling some for some extra gold.