
Hell Raid Guide and Updates
Greetings Heirs,
If you’re reading this guide, then I imagine that you have some basic knowledge of how to raid. You’ve probably cleared your first Queen or maybe you’ve killed her a few times and you want a challenge or just some better gear. Well you’re in the right place, as you would have had to unlock and clear the normal difficulty raid prior to doing the hell raid.
For those who are new and want the normal raid guide, click here.
However, the Hell difficulty of raiding has brought about some nice changes to the morale system, Queen’s badges, gear drops, and the cooldown of the event as a whole. We’ll talk about these changes and what you can expect going into the Hell difficulty, make some hero recommendations for team building, and cover the differences in the newly released bosses.
So first up…
Table of Contents
The Morale System
Previously, when participating in a raid, you would have had to carefully construct a team who’s dialogue options would award you a decent amount of morale while camping, to continue commuting from area to area in the dungeon.
The biggest change to hell raid is that now, once you’ve defeated the boss in a wing of the dungeon, all other bosses will leave the area, so you are limited to one boss per entry token. There will be a teleport marker in the area behind the defeated boss that will unlock and all future attempts at each boss can be started from that location. So if you are not interested in farming mini bosses, or want to switch up your team composition, this is a fantastic change!

In turn, since we are now able to directly teleport to the boss, the “Morale restriction” has been lessened, since reaching the boss no longer relies on having a morale specific comp to traverse the dungeon.
Which leads to our next topic…
Queen’s Badges and Gear drops
In the original Hell difficulty, only two bosses were available – Karkanis and Arakahan.
Each boss dropped one Queen’s Badge each, and killing them both twice a week gave you eight badges a month. Now all five bosses are available to challenge, and each boss gives 2 badges.
While this seems like a minor change, this will allow you to earn 10 badges per month, and purchase items from Hell raid shop each month instead of once every five weeks.
Additionally, first-time clear rewards have been added to each boss and when the boss is defeated there will also be a chest with an additional chance to obtain a piece of gear, left behind.

The first time clear rewards are fairly powerful, with the Immunity – Health Necklace and the Destruction – Attack ring being the most notable. Below is a picture of all the first-time clear rewards. The Attack set helmet is also pretty decent since attack sets are easy to obtain. You get one attack set from the adventures path, two attack sets have been given out as log-in rewards, and there’s a lv.88 attack set which can be purchased over time from the PvP arena currency.
Note: The helmet from the PvP attack set isn’t that good, and the hell raid helm offers significantly more offensive stat distribution.
![]()
Lastly, the hell raid dungeon used to reset each week and that is no longer the case. Hell difficulty resets at the beginning of each month, so there’s plenty of time to approach these new bosses, adjust your setups, and clear each fight.
The tokens to enter hell raid are obtained from killing the queen on normal difficulty, there’s one available for purchase with ancient coins from the ancient coin shop, and one additional token being added to the normal shop for the cost of (3) lab tokens. So if you are no longer interested in running normal difficulty to kill the queen and earn a token, you can just buy your hell token for the week this way.

Hell Raid Shop

In the shop, there are a couple of valuable items that I think are high priority, the rest should be ignored as usual.
The speed sword:

This will be the highest priority piece you can obtain with your badges. You’ll probably end up buying several copies of this weapon As it’s stat distribution favors tanky supports and DPS units very well. Additionally, since this weapon to much easier to obtain than a crafted speed weapon, this opens up crafting possibilities for Wyvern materials.
The Immunity chest:

This piece of gear is a strong secondary pick, as Immunity can be a difficult set to farm from Azumanak 11+. The chest is most Tank focused, but can be a great filler piece for a bruiser if it rolls more defense or critical rate. As previously mentioned, there is a first-time clear reward for an Immunity Neck, so keep this piece in mind if you want to complete the 2-piece set quickly.
What not to buy:
Do not spend your Queen’s badges on charms, catalysts, or unity gear. Basically, If it’s not the two pieces listed above don’t waste your badges. The unity set is significantly weaker than Speed or Immunity sets, and the other prizes in the hell raid shop are the same cost as the normal raid shop.
So with that said, if you are in desperate need of a catalysts, you want an epic charm, or feel like gambling on the queen’s gift, do it with the normal raid badges. Once you feel ready to approach hell difficulty, it’s probably because you’ve outgrown the quality of gear from normal, and it’s a more efficient use of resources to use the normal raid badges.
Cubing, Converting, and Reforging
At the time of writing, the gear conversion system has been revamped and this revamp offers significant benefits to hell raid gear. Previously, hell raid gear which was item level 88, was the strongest gear in the game. It’s the only gear that can roll up to 9% per stat and up to 5 flat speed.
The old conversion system allowed a player to take pieces of equipment, and create a new epic rarity piece of gear using several pieces of the same item level, set type, and slot. For example, you could convert 10, Heroic grade, speed boots to make a new iLv.85 epic speed boot with the main stat of your choice.
The Reforging system, which was introduced recently, uses a new material which drops from the also new tier 13 hunts, and only iLv.85 gear can be reforged into ilv.90 gear, with that system.
Item level 88 gear could not be used as fodder in the old conversion system and could not be reforged. But now, the conversion system has been changed to a cubing system, which allows you to break down any piece of gear as long as it’s iLv.58 or higher. This now includes raid gear.
This new currency, “cubes”, now takes the place of needing duplicates of gear. Which means, all drops from raid can now be cubed, and cubes can be used in the conversion system to make new pieces of iLv.85 gear, and reforged into iLv.90 if rolled well.
So once you’ve killed a few bosses in hell raid, if the stats aren’t to your liking, just cube it! You get significantly higher value compared to before.
And with all these major changes covered, let’s move on to the bosses…
Devourer Arakahan
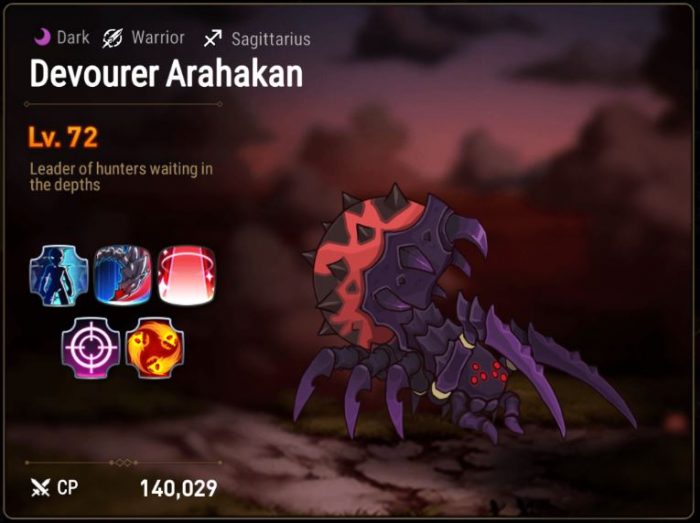
This boss is still very easy, and except now the gimmick using the unbuffable debuff, is permanent. You kill the adds to remove his buffs, and you do big damage while the adds are gone. Any well rounded composition works here.
The bosses in hell raid, by and large, are the same. So if you’ve memorized their mechanics in normal, there are only slight adjustments you need to make before approaching their Hell raid counterparts.
Executioner Karkanis

Karkanis along with Arakahan, were both available before the Hell raid update and their battles are nearly identical to their normal difficulty counterparts. Karkanis only requires you bring an AoE character, and avoid using earth units because he counters everytime you miss. Don’t hit the boss while debuffed, and use your AoE character to uncover his stealth phases. Simple tank and spank boss.
If you have any of the following characters, This fight should be incredibly easy for you.


She’s the ultimate all-rounder for water DPS. She has access to target, defense break, unbuffable and unhealable. Her S2 machine gun fires even when it’s not her turn. Her S2 triggered activation can’t be countered, even if she’s blinded.


The queen of damage mitigation. Her S3 has auto-miss property to get guaranteed debuffs and she wields blind, attack break, and slow debuff. Not only does she cripple the boss but the adds as well, which completely trivializes this fight. It is worth noting that all of her abilities are AoE, so if she’s debuffed she’s going to trigger the counter from the boss every time, but since her debuffs reduce incoming damage but so much, it almost doesn’t matter.


Elena is a super star when it comes to preventing AoE damage. She has AoE invincibility, an AoE heal that procs when hit by AoE damage, reduces Aoe damage and can cleanse two debuffs on her S1.
Secretary Vera

The main thing that has changed about Vera is that she now can not be targeted by single target attacks, while she has adds on the field. You are required to single target her adds, or use AoEs, which have 30% reduced damage while her adds are on the field. If you hit Vera with any counter attack while her adds are up, she will counter with a AoE 100% chance to stun.
It is strongly recommended to use Adamant Shield artifact on your tank while you’re confronting this boss, as it will greatly reduce the damage you take from stray hits during the course of her fight. The key is just bring AoE spamming characters, and focus adds before you attack Vera.
Once you’ve cleared the field, you’re free to lay into Vera. She does have a stacking attack buff that builds up over the course of the fight, but proper use of defensive artifacts helps to mitigate that damage. Her phases still progress the same way as normal mode, so you kill her first phase, you burn the cocoon to stop her from rehatching with an attack increase, and while the tankiness of her adds increases in the last phase, nothing changes mechanically.
Recommended Heroes:
Anyone with Aoe, basically. I even use Sellona and she still does good damage.


AoE clean up, attack buff, and immunity. She’s great for clearing adds due to her ability to recast her S2, and the immunity will help prevent stray stuns during the fight.


This hero is not as common, but she greatly excels in the Raid format because you can take the long walk to the boss to build up souls, and spam her S3 by soulburning it to not consume fighting spirit. Additionally, her unhealable debuff will stop the bosses’ regen.
Juleeve Council

The council has gotten a few new, but hardly improved tricks. The main body form of the council, now attacks 3 times instead of 2 times, which builds poison stacks faster. In the split phase of the fight, the separated council will dual attack often, in addition to the percentage health decrease and the constant buff stripping.
Recommended heroes:


Roana has the best healing potential in the game. Dual attacks, triggered/activated attacks, and counter attacks all activate her passive healing and CR push. She single handedly holds down the entirety of Hell Raid. You can’t solo heal the council with Roana, but paired with a strong cleanser can sustain the battle.


This is the tried and true healer of Epic 7. Ever since her specialty change was announced, she’s been instrumental to any battle that requires large amounts of debuff removal. Her ability to cleanse one debuff of each team member, coupled with her high effect resistance makes her a solid pick for slowing the poisons afflicted by the council.
Any DPS with no debuffs is acceptable for this battle. Ludwig has decent AoE and ST damage, Blood blade Karin brings her own sustain
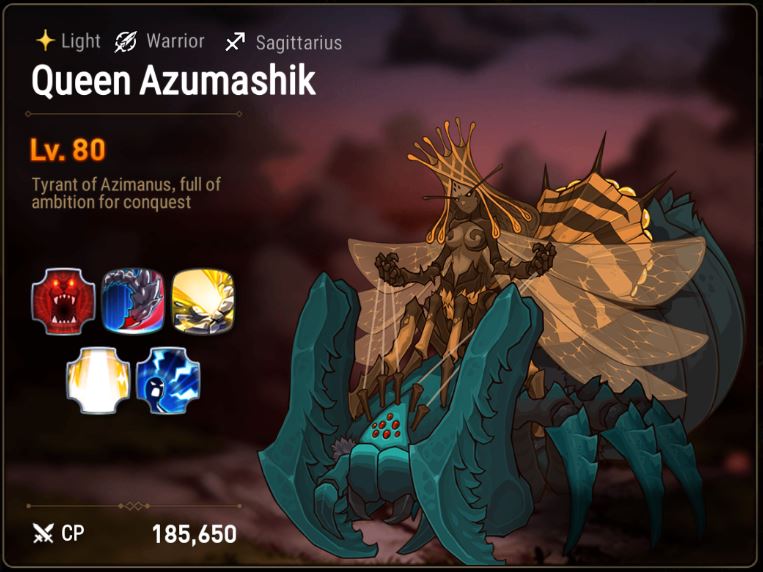
Queen Azumashik

The main change to Queen is that ignoring her adds is now fatal. The Ranx flyers now inflict bleed when they counter, and the Devourers stun. You’ll become overwhelmed with debuffs very quickly, and the bleed will lower your health faster, triggering the additional attacks from the queen when she takes her turn.
The rest of her mechanics are the same. She still shares her damage with her Devourers, and it’s important that you strip her attack and defense buffs when possible, but for the most part, the way you proceed through this fight is the same as in normal. You’ll just need more stats since she’s lv.80 now. Going slow and steady, and clearing all of her adds will almost ensure you get to the end of the encounter.
The actual dangerous part of fighting queen, at least the first time is the mini bosses who spawn half way on your first trip up to her. There’s one on each side of her zone, and they both stack damage and counter frequently. You almost have to be more geared to farm them, then her.

However, If you traverse up the left side of the zone, the Ranx Counterattack Flyer boss (The hornet) is significantly easier to deal with than the Mad Raqix Veteran on the right side.
Recommend Heroes:
Unlike the rest of the bosses, any of the previously recommended characters work for this fight as well. Queen requires a well balanced composition. Any combination of Tank, Healer, DPS, support will work here as long as you have the required skills to do the battle.
Immunity buff to prevent bleed, stun, and silence. Cleanse if you don’t have Immunity.
Strong heals, to keep your health above 50% to prevent Queens extra attacks.
Buff removal to lower Queen’s damage output.
Any DPS works here, as long you’re mindful of the 50% threshold on queen, and they don’t afflict more than 3 debuffs, otherwise she auto cleanses.
A sample team would be:

Cecilia provides AoE provoke and Immunity, as well as a barrier to herself, which will help control incoming damage from the Queen’s adds.
Luluca has Barrier, defense break, defense buff and her base attack increases each time she uses her Skill 3, which you can stack if you choose to walk to Queen instead of teleport.
Destina has AoE Cleanse and Heal, CR push 15% for each debuff removed, 50% CR push and single target healing on her skill 2.
And Charles brings an attack buff, which has synergy with Luluca, All buff strip for single targets (The Queen), and he has attack debuff on his S1, which gives exactly two debuffs, and avoids queens 3-debuff limit to cleanse. This composition maximizes offense and defense, while having preventative and corrective options to siege with.
In Closing
As mentioned before, Hell raid is very similar to normal difficulty, but hopefully this guide is helpful to those of you looking for some entry tips, or ideas for team building. Good luck on your drops and may RNG be in your favor. See you all in the Arena!